Build a Stone Enclosure For Your Hot Tub Spa in 8 Simple Steps
|
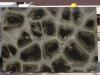
If you own a hot tub spa then you probably already know how important it is to take good care of it. You have undoubtedly been dutiful in the cleaning of every nook and cranny, and in performing that delicate balancing act between hard and soft water or acidic and alkaline water, and even in requesting that your distinguished guests thoroughly rinse the oils and products from their bodies before getting in. There is another area of the hot tub spa that needs to be protected from the elements - the part no one usually even sees - the pipes and undercarriage. In warmer weather that area can become an attractive home to pests and animals, because it is hidden and because it is an inherent heat source, and in cold weather there is the danger of the water in those pipes freezing and expanding, which can burst a pipe and/or damage a seal. A simple yet stylish stone enclosure can prevent either occurrence from happening to your portable hot tub, and insulate it from the weather and the wildlife. It will also improve the hot tub's ability to keep in heat. You will need the following items - a tape measure, several 2-by-4s, several pieces of plywood, screws and a drill with a screwdriver bit, cement mortar, and building stones, the amount depending on the size of your hot tub spa enclosure. Now you are ready to begin building your enclosure for your hot tub spa. Here are the eight simple steps: Step one: clear your work area. If there are any lose rocks, debris, weeds or pieces of a previous enclosure, now is the time to get them out of your way and prepare plenty of space for unhindered movement. Step two: measure. You want to carefully measure the hot tub spa from each angle - height, width, length, and circumference, making sure to write down this information clearly and legibly. Step three: level the base for the foundation. You don't need a level, but it may help. Just make sure you have a flat, even space to put in the base of the enclosure walls. Step four: protect the control panel. Build a simple frame around where the control panel will be, using two vertical 2-by-4s and one horizontal piece. Step five: build the foundation. Fit the biggest building stones together to construct the lower portion of the enclosure. This portion is the most crucial, because it defines the positioning of the rest of the stones and will also provide support for the entire life of your hot tub enclosure. Coat the top and side of each stone with the cement mortar, then carefully place them so that each portion that is in contact with another stone has cement mortar between them. Stack the stones so that the center of each stone lies over the seam of the stones below it to reinforce it. You don't want a tower of stones that will fall over. Scrape off excess mortar that gets squished out when the stones come together. Don't worry about getting enough mortar in between the stones; you don't need much mortar to create a good seal. Be aware that it dries rapidly, so set a pace that works for you. Step six: build up the wall. Continue building your enclosure up to the rim of the portable hot tub. Try to come as close to the outer measurements of the hot tub with the inner measurements of the walls to minimize the gap between them. Remember not to fill in the space created to house the hot tub control panel. Step seven: fill the gap. Once the mortar is dry, insert plywood or any wood that looks like it will fit into the gap to fill the space, depending on how close-fitting your enclosure is to the portable hot tub. Step eight: finish the control panel housing. Screw a piece of cut plywood to plywood housing support boards you set up in step four. Now your portable hot tub has a permanent enclosure, and it can contribute even further to the value of your home while offering a pleasant aesthetic for you and all your hot tub spa guests to admire.
|