|
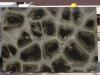
Laying black granite tiles on your countertop will add a classy and elegant touch to your bathroom or kitchen. Installing black granite tiles is also much more affordable than installing a solid granite countertop. Black granite tiles can be installed on a bare substructure or on a previously laminated countertop. With the correct materials and tools, laying black granite tile on your countertop is a job that can be done on your own.
1
Remove the sink and any fixtures that are affixed to the countertop.
2
Remove the backsplash with a crow bar. Sand the wall where the backsplash was.
3
Sand the countertop with a power sander and 50-grit sandpaper to create an abraded surface if you are installing over a laminate. Wipe away the dust that was left from sanding with a damp sponge or rag. Remove the lamination if it is in poor condition. Remove the laminate by softening it with a heat gun, scoring the edges with a utility knife and prying it up with a scraper. Use lacquer thinner to help dissolve the adhesive while prying up the old lamination. Sand the substructure to remove any residue or replace the cement boards if they are damaged.
4
Plan your layout by setting your tiles on the counter. Use tile spacers to account for rout lines.
5
Cut tiles to fit around corners and along edges with a diamond blade tile saw.
6
Polish any tile edges that will be exposed to give them a rounded edge using an electric tile polisher. Start polishing with a coarse grit pad and gradually work towards a finer grit pad.
7
Lay the tiles using thin-set mortar and a notched trowel. Use a mortar specially formulated for going over lamination if you are installing over a previous countertop. Follow the manufacturer's instructions for preparing the mortar. Lay tiles by applying roughened patches of the mortar to the countertop. Start at the center, front edge and gradually work your way over and back. Allow enough overlap over the edges to accommodate the edge trim tiles. Work in small sections at a time. Use tile spacers to allow space for grouting. Press down on each tile to secure it firmly into the mortar. Clean any mortar that squeezes out from beneath the tile, using a damp sponge. Make sure the tiles are lying perfectly flat by running a piece of plywood across the surface and tapping on it gently with a rubber mallet.
8
Mortar strips of cut tile around the front and side edges of the countertop. Hold these vertical strips in place with 1 1/2-inch-wide masking tape while the mortar cures.
9
Mortar strips of tile to the back wall to create a backsplash. These can be attached directly to the drywall or, for a thicker backsplash, to an underlying strip of plywood that has been cut to fit.
10
Allow the mortar 24 hours to cure.
11
Grout the gaps between the tiles. Mix the grout according to the instructions. Spread the grout and force it into the gaps with a rubber grouting float. Clean the excess grout with a damp sponge. Run a dowel between tiles to smooth down the grout. Allow the grout at least 12 hours to cure.
12
Apply grout sealer with a small paintbrush. Quickly clean any sealer that gets onto the tiles with a damp sponge.
13
Caulk along top edge of the backsplash with a water-resistant caulk. If you used plywood underneath, cap the top edge of the backsplash with a pre-finished wood trim. Attach wooden trim with caulk, screws and screw plugs.
|