|
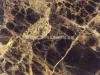
Laminate and granite are pretty much at opposite ends of the spectrum when you think of the quality of countertops, but they're actually very similar. Whatever a countertop is covered with, it has a simple base of particleboard. If you've got an old laminate countertop and you'd rather have a new granite one, consider installing granite tiles right over the laminate. This only works if the countertop surface is solid and unbroken, and the laminate is fully adhered and not bubbling or loose anywhere.
1
Sand the countertop laminate with the grout sander, getting it completely dull and flat. Don't try to sand through the laminate, but rather just take off the shine. Wipe off the dust.
2
Mark a straight line with your carpenter's square over the middle of the countertop, from the front edge to the back. Make the line come down around the front edge, facing you.
3
Cut granite tiles on your wet saw to the height of the front edge, which is generally two inches high. Cut enough tiles to go from one end of the countertop to the other.
4
Apply thin set mortar over the front edge with a notched trowel. Press the first two pieces of cut tiles to the edge, on either side of the line, with the cut edge facing up and lined up with the top surface of the countertop. Set spacers between the tiles. Hang the rest of the front-edge tiles in the same fashion, working your way out toward the edges. Cut the tiles at the ends to fit.
5
Spread thin set mortar over the whole top of the countertop. Press the front row of tiles into place starting on either side of the line and lining them up along the length. The front edges of the tiles should cover the cut side edges of the tiles that are hanging vertically and form a corner with them.
6
Set the rest of the tiles over the surface of the countertop in rows, starting each row at the center, working out to the sides, and cutting the ends as necessary. Put spacers between all of them.
7
Let the tiles set overnight. Pull out the spacers. Grout the countertop with your grout squeegee, spreading the grout over the surface and pressing it into the lines. Wipe up the excess grout with a damp sponge.
|