|
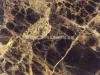
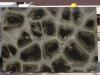
Creating an interior stone veneer wall can add a sense of character and warmth with a natural and dynamic look. Having an additional layer of stone on the wall also adds more insulation when placed on the interior of an exterior wall. There is a moderate amount of prep work needed before installing the stone. The time needed for the entire project is approximately three days. The four main components include felt paper, metal lath, mortar and stone veneer. Manufactured stone is usually a chemically inert product and contains natural mineral oxide colors, lightweight aggregates and Portland cement.
1
Measure the wall surface area to be covered. Subtract the area where stone will not be applied such as windows and doors.
2
Before removing any outlets and switch covers, turn off the circuit breaker. Use a circuit tester to ensure there is no flow of electricity from the outlet. Remove outlet and light switch covers and wall trim.
3
If you are installing stone veneer directly over clean and untreated concrete or masonry surfaces, you can do so without a moisture barrier or metal lath. However, on materials such as drywall you must prepare the surface. Cover the wall with felt paper or plastic sheeting to create a moisture barrier. Overlap the sheets by four inches. Use nails or a staple gun to attach to the wall.
4
Cover the moisture barrier with metal lath for better mortar adhesion. The pieces of lath should overlap by six inches. Secure to the wall over the moisture barrier by hammering the galvanized nails one inch deep into wall studs, not just the wall board. You can also use a staple gun. The nails or staples should be six inches apart.
5
Slowly add water to the powdered mortar and mix for about five minutes, until it reaches a medium consistency. To test for the correct consistency, try scooping some mortar in a trowel and turn it upside down. When it is the right consistency, it should stay on the trowel for a moment then slide down. Apply a one-half to three-fourths inch thick scratch coat of mortar mix to the wall. Make sure the metal lath is completely covered. Apply sections of mortar four to nine square feet at a time so that the mortar remains moist to add groves to the mortar using the trowel edge. This will create better adhesion when the next coat of mortar is applied. Let it dry for approximately 48 hours.
6
On a floor, use the wall measurements and stones to create a layout of the stone wall in the desired pattern and include gaps for mortar joints. Stagger the stones so there are no large vertical joints. Some pieces may not fit exactly, but they can be cut to the exact measurement prior to installing that particular piece. Place the jury stick along the stone edges in the laid out pattern. Mark the location of the stones onto the jury stick. Use the marks as guidelines to transfer the stone location marks onto the wall's dry mortar scratch layer.
7
Use a long trowel and apply mortar to a small section of the wall. Apply mortar evenly to the back of the stone. Push the stone into the wet mortar on the wall with a slight twist to lock it into place. Use the handle end of the hammer to gently tap the stone into the wall mortar. Push the handle on the stone to hold the stone in place for a few moments to make sure that it is securely remains on the wall.
8
Fill a grout bag with mortar and fill in the joints between the stones. In about 30 minutes, any excess mortar on the stones will become drier and can be dusted off with a dry brush. To smooth mortar joints, you can use the trowel or a wooden stick. After the mortar is dry, you can use water and mild soap to clean the stone.
9
For any outlets, install box extenders. The extender is usually about one and one-half inches deep, but if more depth is needed for your wall, contact an electrician to make it flush with the front of the stone.
|