|
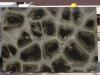
Natural stones come in a variety of shapes and sizes, ranging from rough-hewn slate to polished marble and granite. While most tile patterns are laid out with a grout joint in mind, in some cases a homeowner or designer will choose to install the stone with little to no grout joints between in order to have a cleaner, more natural look for the installation. While technically similar to installations using grout, there are a few key differences that influence the installation process.
1
Lay two of the stone pieces on the floor next to each other, allowing for a slight gap between them. This gap should be no more than 1/16-inch, and is given to allow for seasonal movement of the floor. Use the tape measure to find the distance between the outside edges of both pieces.
2
Lay out a grid pattern on the floor to use as a reference. Use the measurement from your dry-laid pieces. Find the longest wall of the room. Measure out the distance of the two tiles at either end of the wall and make pencil marks on the floor. Use the chalk line to pop a reference line between those two pencil marks.
3
Go to the opposite wall and measure out the distance of two tiles along the already-snapped chalk line. Make a pencil mark and use the framing square to draw a perpendicular pencil line across your already-snapped chalk line. Use the chalk line to snap across the pencil line to give yourself two reference lines.
4
Measure out additional grids as necessary, using your two-tile measurement to make pencil marks out from the first two grid lines. Always use the framing square to double-check your grid lines for square.
Installation
1
Take the notched trowel and spread an even layer of thinset mortar into one of the grid boxes. Spread up to the edge of the reference lines, leaving just enough of the line visible to use as a reference point. Pick a corner of the room and work your way backwards towards the doorway or opening. Never spread more than one grid box at a time until you are comfortable with your working speed.
2
Place a piece of stone onto the bed of thinset mortar and press firmly downward while moving the piece slightly in all directions to ensure bond with the mortar. There should be the audible sound of air being forced out from beneath the stone. Once the stone is firmly embedded in the mortar, move it to its final position along the grid lines. This process may be repeated for each individual piece of stone, bearing in mind that the grid lines are a reference only; individual stones may vary in size and may need to be adjusted in one direction or another to make the installation form together better.
3
Use the tape measure and grease pencil to mark any necessary cuts into corners, around cabinets or other amenities and make the cuts on the tile wet saw. Dry the back of each piece of stone completely with an old towel or rag before installation to ensure there is no water to impede the bond between stone and mortar.
4
Allow a minimum of 24 hours for light foot traffic or installation of amenities such as cabinets, toilets or otherwise. A minimum of 72 hours should be given for any foot traffic, with a full week being preferred if possible.
|