|
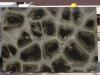
A stone accent wall can turn a drab, average living room into something you'd find in an interior design magazine. To make your own stone wall, you won't need to tear down an existing wall. Instead, cover an interior wall with stone veneer. Stone veneer adds high class masonry to your home without compromising the structural quality of the original wall beneath it. The stones come in many shapes, colors and sizes to help you tailor the design to your home décor.
1
Nail a 3.4 metal lath over the surface of the wall using 1-and-1/2-inch to 2-inch nails. Place the nails into studs to insure durability. Place nails 6 inches apart on each stud to secure the metal lath to the wall. Overlap the metal lathe at corners and at the edge of new sheets.
2
Apply a thin scratch coat over the metal lath using a trowel. An adequate mixture of scratch coat should be two parts sand and one part cement. Scratch up the surface of the scratch coat with a hand rake or metal scraper to score the surface of the wall. Let the coat set completely. Most scratch coats set within 48 hours.
3
Apply Type S mortar to the back of each stone with a trowel. Ensure mortar thickness of 1/2 to 3/4 inches for proper adhesion. Apply the mortar to each stone individually just before applying it to the wall.
4
Press the mortared stone directly onto the pre-scratch coated wall. Press firmly and wiggle the stone into place. You may see mortar squish out from beneath the stone. Apply each stone in this manner with the stones as close to other stones depending on the way you want the finished interior stone wall to look. Let the mortar set for 30 minutes.
5
Remove excess mortar from between the stones with a joint tool. Brush away any mortar from the surface of the stones with a stiff, metal brush. If you want to add grout between the stones, fill a grout bag with mortar and fill the spaces between the stones. Wipe away excess grout with a trowel, brush or joint tool. Let dry completely.
|