|
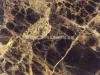
Ceramic tiles come in a variety of sizes and shapes. There are even ceramic tiles that look like stone. You install the ceramic stone tile the same way you do any other ceramic tiling. The difference is the type of base where you install the ceramic stone tile. A concrete floor has different instructions than a wood subfloor. If you're attaching the ceramic stone tiles to a shower wall, that's also a different process. Since most of the ceramic stone tile is on a wood subfloor, that's the type of installation that this article will cover.
1
Find the measurement for the area of floor where you'll put the tile. You'll need to have these measurements so you know the amount of ceramic stone tile you'll install and for the uncoupling membrane you'll purchase.
2
Spread a layer of thinset onto the area between one set of chalk lines. Use a 3/16-by-1/2 inch v-notched trowel to spread it. Use a 75-pound linoleum roller to press the membrane flat after you lay it. Only put down as much thinset as you can cover in a 20-minute time.
3
Remember that not all membranes are alike. You'll need to check the directions that come with your specific membrane to see how soon you can tile. It may be as long as 24 hours after you lay it.
4
Create the patter for the tiles. Make sure that use start in front of the focal point of the room so you have the least amount of irregularities there. Move three courses of tiles out from the focal point wall, snap a chalk line and lay down tiles on the line. Use the edge of one of the tiles to find the starting point and snap a perpendicular chalk line. If you start in the middle of the room, make these at the middle of the length and middle of the width. Lay out one line of dry tiles using these lines. Snap lines every three courses of tile. This is especially important if you're doing a big room. It keeps the lines straight.
5
Inspect the lines to make sure they're straight and all the tiles are the same thickness. If you find some tiles thinner than others, use these in places you can't see. You'll need to butter the backs of the tiles with mortar to compensate. Use spacers if necessary and allow for expansion when you're working in a large room.
6
Spread the thinset in a 30-square foot area where you intend to start. Spread it with a 3/8-inch notched trowel. A latex base allows you to grout quicker but a dry-set thinset is cheaper. If you need to cut tiles, use a wet saw.
7
Start at the layout and work toward the outside of the room. When you install the ceramic stone tile slide them in place. It insures you get a thorough coat of thinset on it. Check the container of thinset to see how long it needs to dry before you grout. Chip away any thinset in the grooves that doesn't allow the grout to be at least 1/8 of an inch deep. Clean any thinset off the top of the ceramic stone tiles. Seal the top of the tiles and allow it to dry. Grout the tiles. Allow it to dry and proceed with cleaning them.
|